Getting Started with Specifai 🚀
Welcome to Specifai - your AI-powered companion for revolutionizing the SDLC process! This guide will help you get up and running with Specifai, transforming how you manage project requirements.
📋 What You'll Learn
In this guide, you'll learn how to:
- Install Specifai on your system
- Perform initial configuration steps, including:
- Setting up your user profile
- Configuring your workspace
- Connecting your preferred AI model
- Adjusting optional settings like analytics
- Verify your Specifai installation
- Discover next steps to start building solutions
🔍 Before You Begin
System Requirements
- Windows 10/11 or macOS 10.15+
- 4GB RAM minimum (8GB recommended)
- 1GB free disk space
- Internet connection for AI features
📥 Installation
Download Latest Release (v2.8.1)
Choose your platform:
- Windows: Download Specifai for Windows
- macOS:
💡 Mac users: Check your processor type in Apple Menu → About This Mac
View all versions on our releases page.
Quick Install Guide
Windows
- Run the downloaded
.exefile. - Follow the installation wizard.
- Allow security permissions if prompted.
macOS
- Open the
.dmgfile. - Drag Specifai to Applications.
- Right-click and select "Open" (first time only).
🎯 Initial Setup
When you first launch Specifai, you'll see the welcome screen, guiding you through a quick setup process. Here's what you need to do:
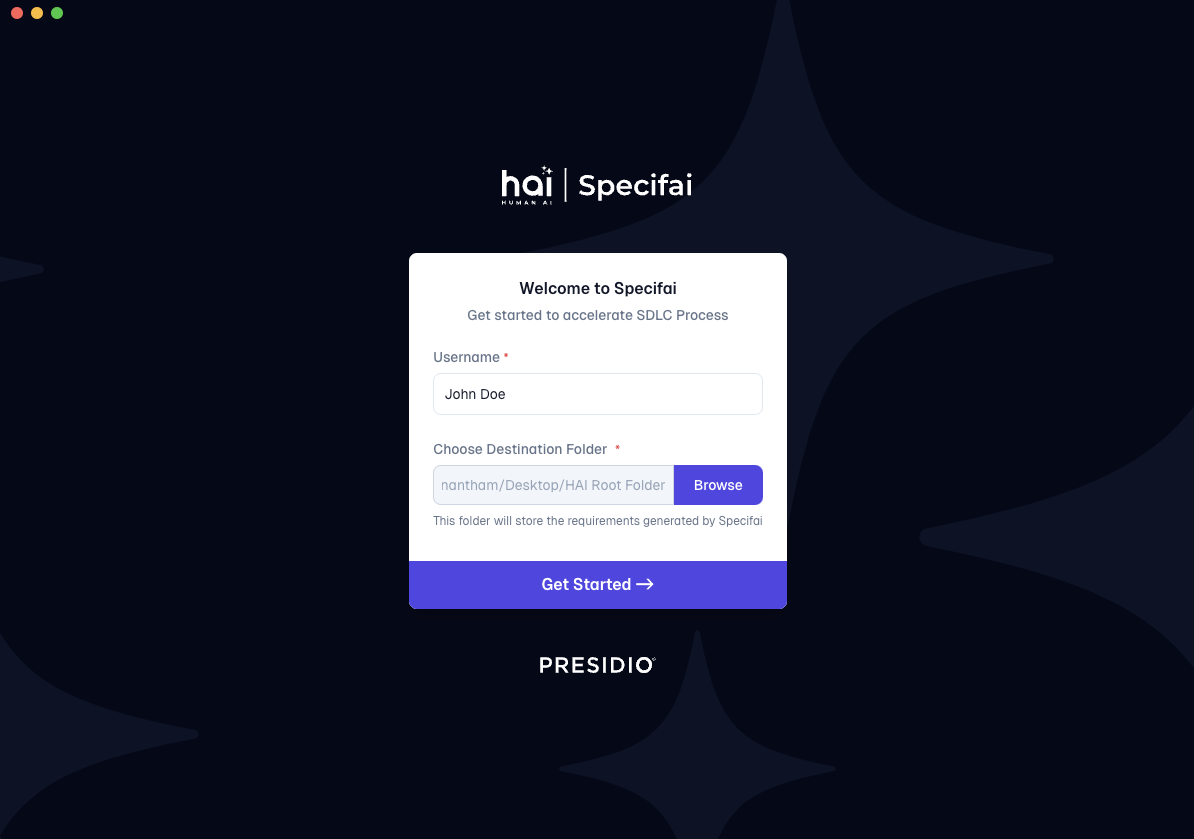
1. User Profile
- Choose a username that identifies your work.
- Example: "john.doe" or "sarah.dev".
2. Workspace Setup
Choose a workspace directory that is:
- Easily accessible
- Has proper file permissions
- Has sufficient storage space
- Ideally synced with cloud storage (like oneDrive)
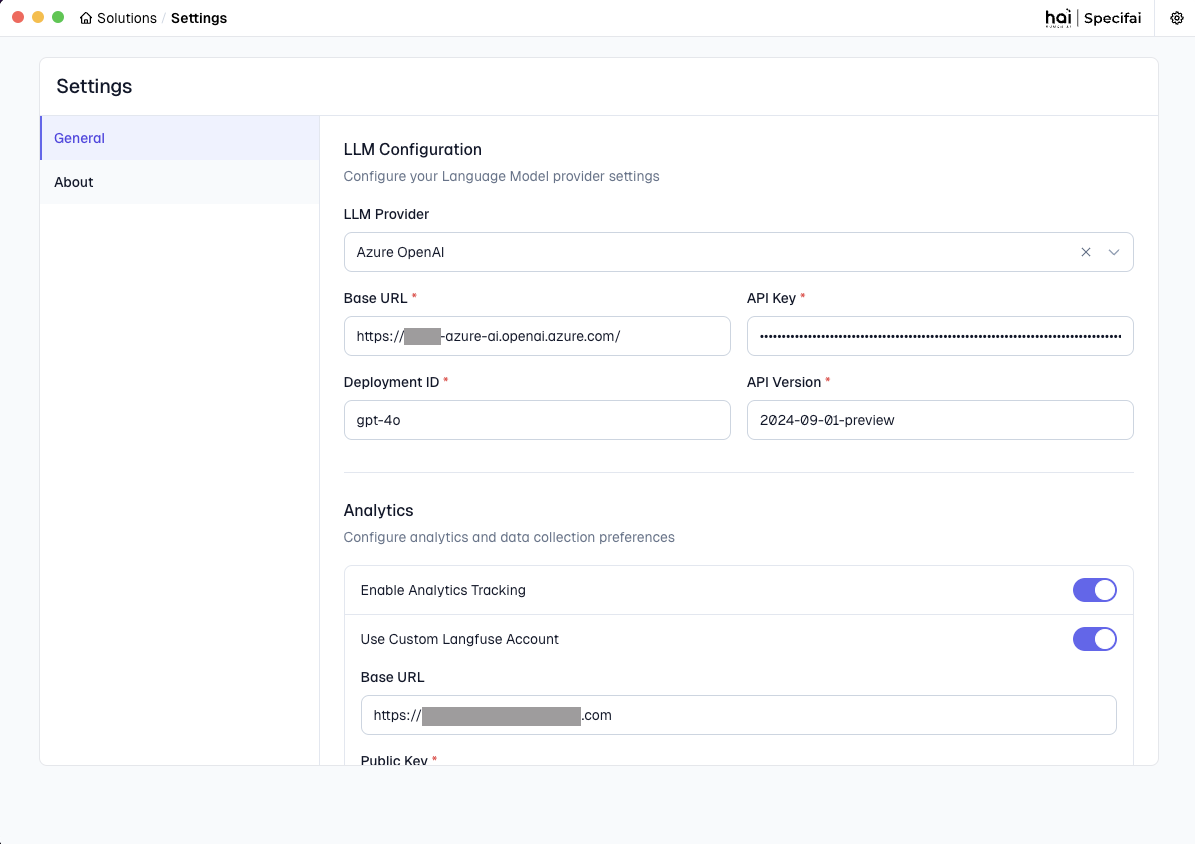
3. AI Model Configuration 🤖
-
Access Settings ⚙️ (top right corner).
-
Select AI model provider:
- Anthropic
- claude-opus-4-20250514-v1:0
- claude-sonnet-4-20250514-v1:0
- claude-3-7-sonnet-20250219-v1:0
- claude-3-5-sonnet-20241022-v2:0
- claude-3-5-haiku-20241022-v1:0
- claude-3-5-sonnet-20240620-v1:0
- claude-3-haiku-20240307-v1:0
- claude-3-opus-20240229-v1:0
- claude-3-sonnet-20240229-v1:0
- Azure OpenAI
- gpt-4o
- gpt-4o-mini
- OpenAI Native
- gpt-4o
- gpt-4o-mini
- AWS Bedrock
- anthropic.claude-opus-4-20250514-v1:0
- anthropic.claude-sonnet-4-20250514-v1:0
- anthropic.claude-3-7-sonnet-20250219-v1:0
- anthropic.claude-3-5-sonnet-20241022-v2:0
- anthropic.claude-3-5-haiku-20241022-v1:0
- anthropic.claude-3-5-sonnet-20240620-v1:0
- anthropic.claude-3-haiku-20240307-v1:0
- anthropic.claude-3-opus-20240229-v1:0
- anthropic.claude-3-sonnet-20240229-v1:0
- Gemini
- gemini-2.0-flash-001
- gemini-2.0-flash-lite-preview-02-05
- gemini-2.0-pro-exp-02-05
- gemini-2.0-flash-thinking-exp-01-21
- gemini-2.0-flash-thinking-exp-1219
- gemini-2.0-flash-exp
- gemini-1.5-flash-002
- gemini-1.5-flash-exp-0827
- gemini-1.5-flash-8b-exp-0827
- gemini-1.5-pro-002
- gemini-1.5-pro-exp-0827
- gemini-exp-1206
- OpenRouter
- Ollama
-
Enter model credentials.
-
Click "Save" to apply your model settings.
-
Connection verification:
- Displays a success notification if the connection is established successfully.
- If there's an error, check your credentials and internet connection.
4. Optional Settings
Analytics & Updates
- Enable/disable usage analytics to track the performance of Specifai.
- Configure automatic updates.
- Set up custom Langfuse analytics (optional).
Save Your Configuration
- Click "Save" to apply your changes.
- Verify settings are saved successfully.
✅ Verification Steps
Ensure your setup is complete by checking:
- Specifai launches without errors.
- Your chosen workspace is accessible.
- The AI model connection is working correctly.
- Analytics are configured as desired (if enabled).
🎉 Next Steps
You're ready to start using Specifai! Here's what to do next:
-
Create your first solution:
- Learn about solution structure.
- Understand different requirement types.
- Start documenting requirements. (See: Core Features Guide)
-
Set up integrations:
- Configure Jira integration.
- Configure Azure DevOps integration.
- Set up AWS Bedrock.
- Add custom MCP servers. (See: Integrations Setup Guide)
🆘 Quick Troubleshooting
Having issues? Check these common solutions:
-
Can't Start Application?
- Verify system requirements.
- Check internet connection.
- Run as administrator (Windows).
-
Workspace Issues?
- Verify folder permissions.
- Choose a different location.
- Close conflicting applications.
-
AI Model Problems?
- Verify credentials.
- Check internet connection.
- Confirm model availability.
Need more help?
- 📚 Full Troubleshooting Guide
- 🐛 GitHub Issues
- 📧 Contact: hai-feedback@presidio.com
Specifai is designed to make your development process smoother and more efficient. Don't hesitate to reach out if you need help getting started!