Solution Creation & Management 🎯
This guide walks you through creating, structuring, and managing solutions in Specifai.
🎯 Solution Creation
Creating Your First Solution
 Transform your ideas into well-structured solutions in minutes
-
Launch Solution Creation:
- Click the "New Solution" button on your dashboard.
-
Pro tip: Keep the dashboard organized by using clear naming conventions.
-
Define Solution Details:
- Solution Name: Choose a clear, descriptive name.
- Good example: "Task-Management-System"
- Avoid: Generic names like "New Project."
- Description: Provide comprehensive context.
- Include business objectives, key stakeholders, and primary goals.
- Mention any third-party integrations or compliance requirements.
- Technical Stack: Specify your technology choices, such as:
- Frontend frameworks (e.g., React, Angular)
- Backend technologies (e.g., Node.js, Java)
- Databases (e.g., PostgreSQL, MongoDB)
- Infrastructure (e.g., AWS, Azure)
- Is solution built already?: Configure requirement generation preferences using this toggle.
- When enabled: No requirements will be automatically generated, giving users more control over requirement creation.
- When disabled: Specifai starts fresh with new requirement generation based on the provided context.
- Solution Name: Choose a clear, descriptive name.
-
Configure Solution Preferences: Set the minimum number of requirements (default: 15) to be generated for BRD, PRD, UIR, and NFR types. Adjust this based on your project's scope.
-
MCP Integration Setup: Enhance your solution with Model Context Protocol (MCP) servers:
- AWS Bedrock KB:
- Connect to an AWS Bedrock Knowledge Base.
- Leverage enterprise knowledge for better context.
- Enable advanced AI capabilities.
- Custom MCP Server:
- Add new MCP servers for extended functionality.
- Configure custom integrations and access additional AI models and tools.
- For detailed setup, refer to our MCP Integration Guide.
- AWS Bedrock KB:
-
Create Solution Space:
- Click "Create" to initialize your solution with requirements and MCP configurations.
- Watch as Specifai sets up your workspace with AI-powered intelligence.
Understanding Solution Structure
Each solution follows a modular, scalable structure:
📁 Solution Root Folder
├── 📄 .metadata.json            # Solution configuration
├── 📁 BRD                       # Business Requirements
│   ├── 📄 BRD01-base.json
│   └── 📄 BRDxx-base.json
├── 📁 NFR                       # Non-Functional Requirements
│   ├── 📄 NFR01-base.json
│   └── 📄 NFRxx-base.json
├── 📁 PRD                       # Product Requirements
│   ├── 📄 PRD01-base.json
│   ├── 📄 PRD01-feature.json    # User Stories & Tasks
│   ├── 📄 PRDxx-base.json
│   └── 📄 PRDxx-feature.json
├── 📁 UIR                       # User Interface Requirements
│   ├── 📄 UIR01-base.json
│   └── 📄 UIRxx-base.json
├── 📁 TC                        # Test Cases
│   ├── 📁 US1                   # Test Cases for User Story 1
│   │   ├── 📄 TC01-base.json
│   │   └── 📄 TCxx-base.json
│   └── 📁 USx                   # Test Cases for User Story x
│       ├── 📄 TC01-base.json
│       └── 📄 TCxx-base.json
├── 📁 SI                        # Strategic Initiatives
│   ├── 📄 SI01-base.json
│   └── 📄 SIxx-base.json
└── 📁 BP                        # Business Process Flows
    ├── 📄 BP01-base.json
    └── 📄 BPxx-base.json
Key Components
-
🔖 Metadata Configuration (
.metadata.json) This file stores essential solution details:- Solution name and description
- Technical stack details
- Creation and modification timestamps
- MCP Tools configuration
-
📑 Document Folders Each folder contains specific requirement types:
- BRD: Business objectives & stakeholder needs.
- PRD: Technical specs & implementation details.
- User Stories: Actionable items from PRD.
- Tasks: Breakdown of user stories.
- NFR: Performance & security requirements.
- UIR: UI/UX design guidelines.
- TC: Test cases for quality validation procedures.
- SI: Strategic initiatives for high-level organizational objectives.
-
📊 Business Process Flows (
BP) This folder contains visual representations of your key business processes.
✍️ Organizing and Refining Your Requirements
Once your initial documents are generated, Specifai provides robust tools to organize and refine your requirements.
1. Adding Requirements
- Fill in Basic Details:
- Title: Write a clear, descriptive title that reflects the requirement's purpose.
- Description: Provide comprehensive details about functionality, constraints, and goals.
- Code References: Upload relevant code files to provide implementation context.
- Enhance with AI:
- Click the "Enhance with AI" button to improve requirement quality.
- Requirements are automatically saved when enhanced.
- Use the "Add" button to create the new requirement.
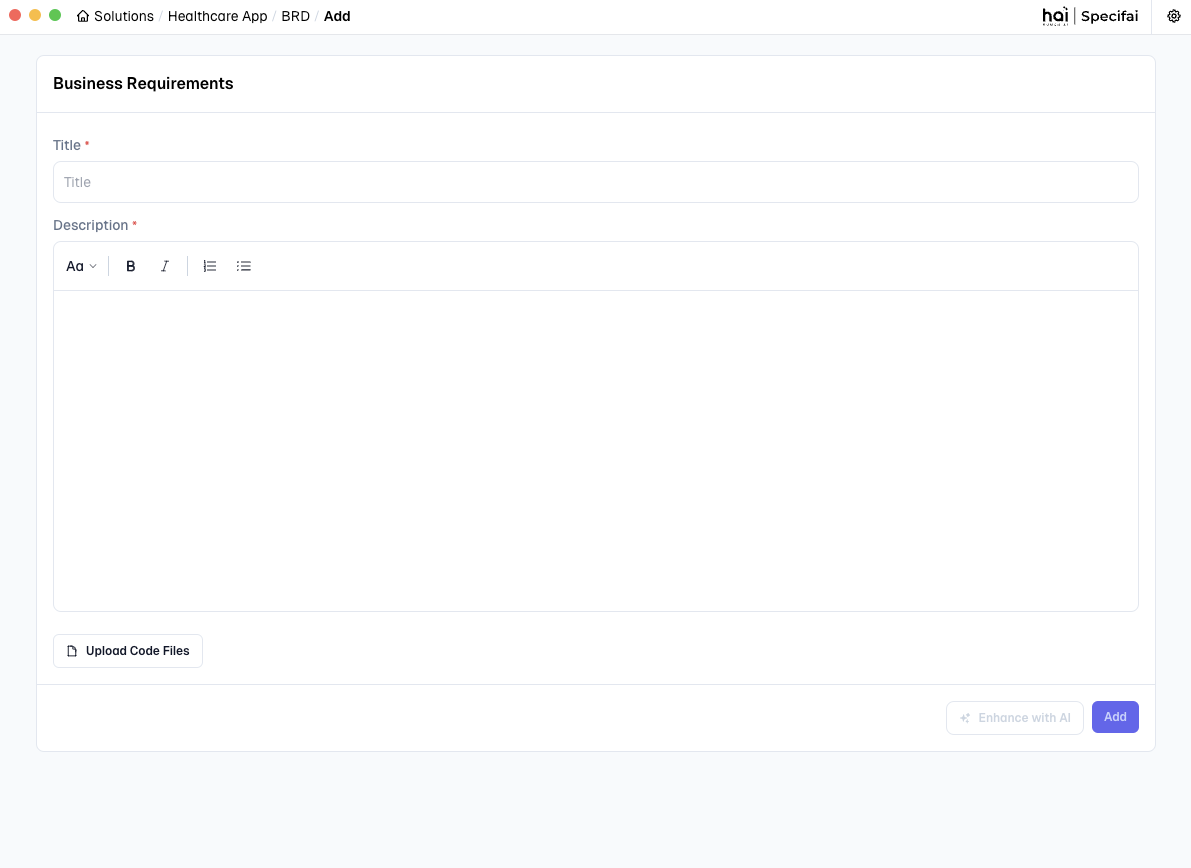 Interface for adding a requirement (e.g., a BRD)
2. Updating Requirements
- Select and Modify:
- Click any requirement to open it for editing.
- Update the title and description as needed. Changes are auto-saved as you type.
- AI Enhancement:
- Use "Enhance with AI" to improve existing content.
- Review and apply AI suggestions as needed from the AI Chat Interface on the right side of the screen.
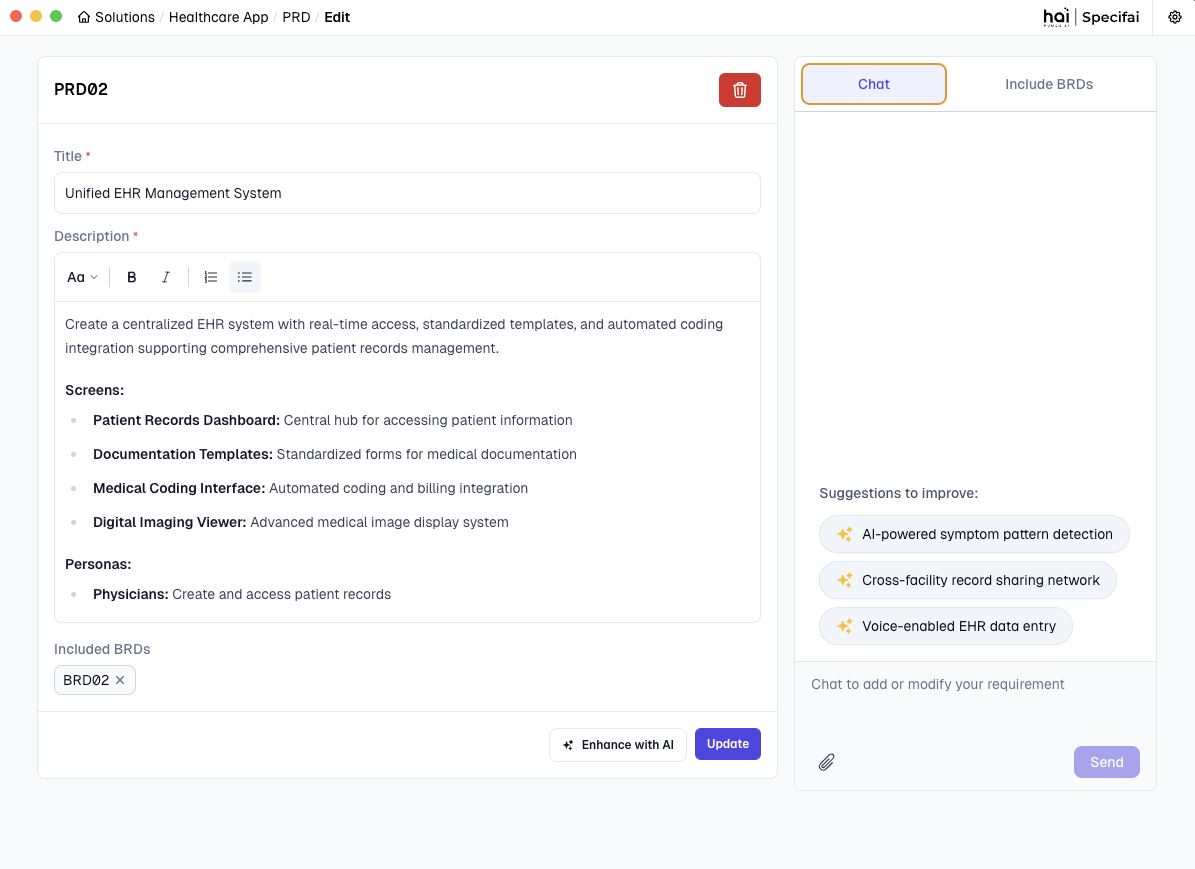 Updating a requirement with AI assistance
💡 Pro Tip: Use the AI chat interface for real-time suggestions and improvements when updating requirements.
3. Deleting Requirements
- Remove Requirements:
- Click the "Delete" button on any requirement.
- Confirm deletion in the verification dialog.
- Requirements are soft-deleted for safety.
- Archival System:
- Deleted requirements are stored in the HAI Solution Folder.
- Full history and relationships are preserved, allowing you to recover deleted requirements when needed.
🧠 Model Configuration
Specifai offers flexible AI model configuration, allowing you to choose and connect to various powerful language models to best suit your project's needs.
For detailed setup instructions, refer to our Getting Started Guide.
 Easily configurable multi-provider AI model support
Need help? Check our troubleshooting guide for quick solutions, or reach out to support if you have any questions.
Specifai is continuously evolving to meet your needs—be sure to check our release notes for the latest features and improvements!